1997-1999 Pontiac Grand Prix

1997-1999 Pontiac Grand Prix

The connections to be made on the Grand Prix are at the Body Control Module. The Body Control Module is under the dash, left side by the parking brake pedal.

Remove the left instrument panel insulator. Refer to Instrument Panel Insulator.

Disconnect the BCM electrical connectors.

1997-1999 Pontiac Grand Prix BCM Location

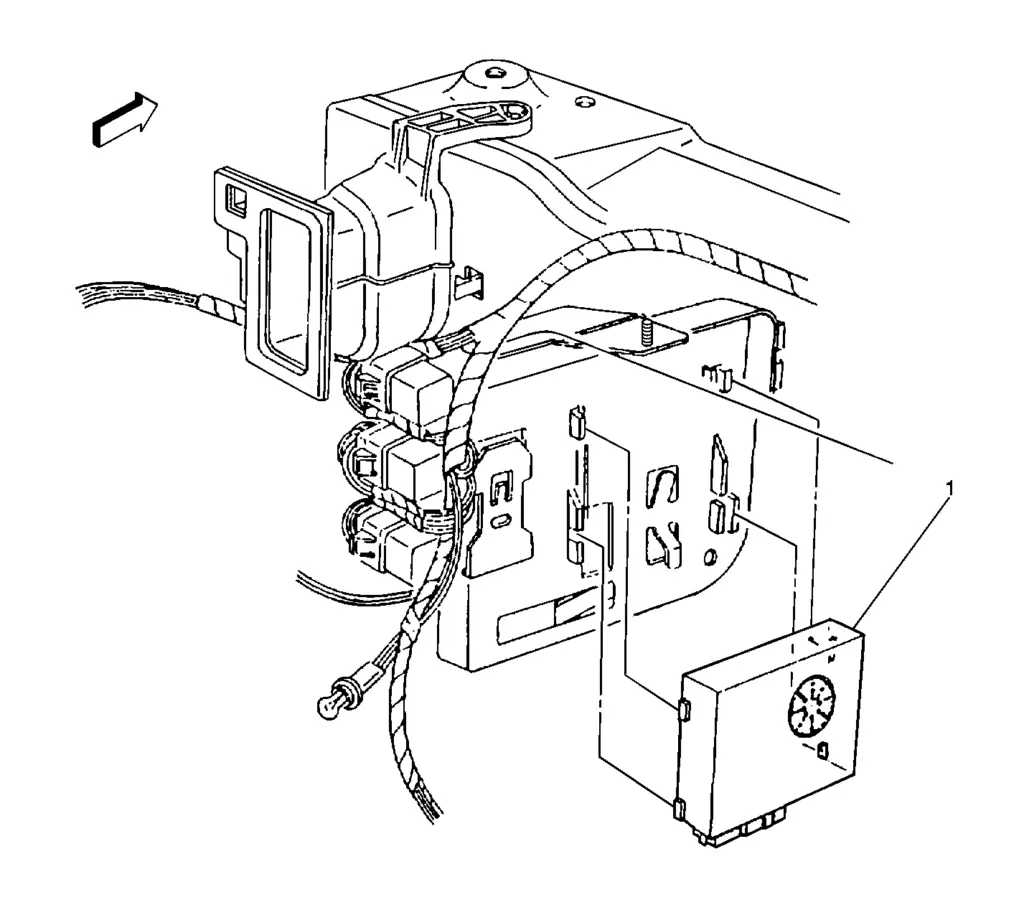
There are only 2 connectors. First is the nature or white C1 with 8 terminals.

1997-1999 Pontiac Grand Prix BCM Connector C1

And second is the Blue C2 connector with 32 terminals.

1997-1999 Pontiac Grand Prix BCM Connector C2

These pictures are looking into the end of the plug that goes into the module.

If the enclosure of your NEWROCKIES PRO Module is green and blue, please setup the switches as following (if enclosure is black, please submit a request to our support team for correct switch configurations):

Open the NEWROCKIES PRO Module’s cover (this will NOT void the warranty) by removing the 2 screws on the bottom. Inside there are 2 sets of switches.

Set the switches as in the photo here below:

PassKEY 2

Connect as following:

PRO Module
CAR Wires
RED
splice into the pink wire in connector C2, pin C13.
WHT
Not Used
BLK
splice into the black wire in connector C1, Pin D.
PPL
Not Used
GRN
Cut the Dark Blue wire on Connector C2, pin D16, then connect GRN of PRO Module to the part of the dark Blue wire that goes toward the harness away from the BCM. Tape the side of the dark Blue wire that goes to the BCM.
YEL
Not Used
BRN
Not Used

Troubleshooting

  1. Make sure connector’s pinout and wiring colors of your car are both matching exactly those of our instructions. If not, please Submit a Request to our support team with details of the pinout and wiring colors in your car.
  2. Is the light on the side of the PRO module turning on? If not check power between RED and BLK wires of the PRO module installed and with the key in the ON position (you can use a power-meter or a light) and Submit a Request to our support team with results of the measurement.​
  3. If your instructions do NOT make use of the PPL wire of the PRO Module then skip this step, otherwise, if you use the PPL wire and points (1) and (2) above are correct and your car is not even cranking then make sure the PPL wire of the PRO bypass is connected correctly and the connection is tight. Also try shorting with a loose piece of wire the PPL and BLK of the PRO module.  
  4. If car is still not cranking then Submit a Request to our technical support team detailing the tests you have done and the results.
  5. If the car is cranking, but engine doesn’t start or sometimes starts but immediately dies then do the following:
    1. If your instructions make use of the GRN wire of the PRO Module, then make sure the GRN wire of the PRO bypass is correctly connected and the connection is tight.
    2. Open the PRO module’s cover by removing the 2 screws on the bottom and change switches 7 and 8 of SW1 to [7:ON, 8:OFF] or to [7:OFF, 8:ON]. Make sure the switches 1-6 of SW1 are exactly as indicated in the instructions for your car model/year and if not, then change them accordingly. Try starting the car.​

If car is still not starting or if you have any questions or concerns please Submit a Request to our technical support team detailing the tests you have done and the results.


NOTE: when contacting our support team, please always indicate your car’s make, model and year.

Is the GM Security System (VATS, Passkey or Passlock) giving you problems?

Would you like to solve the problem permanently...

You are in the right place!

NEWROCKIES is #1 in the world. It was born to solve GM VATS System problems once and for all and it’s the only thing we do. Our PRO Module is a FULL VATS Bypass that gets rid of the system entirely, the Key part, the Lock part and the TDM (which is the brain of the system).