2000-2002 Saturn SL SW SC Series

2000-2002 Saturn SL SW SC Series

Locate the BCM and install the PRO Full Bypass

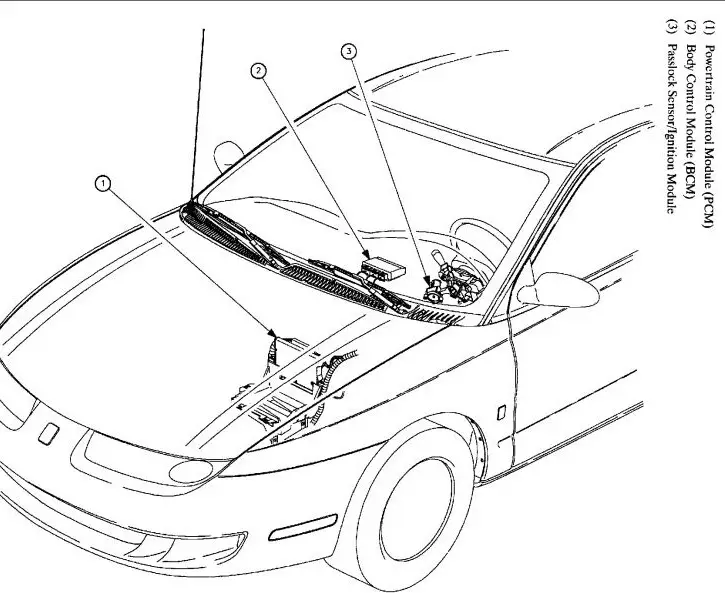
The BCM is mounted on the top of the dash under the pad.

2000-2002 Saturn SL SW SC Series BCM Location 1

1. Disable the SIR system by taking the battery cables off.

Notice: Be careful not to damage the VIN plate when removing or replacing the upper trim panel.

Remove the instrument panel upper trim:

2.1.Remove the screws located under the upper trim panel on the passenger’s side of the vehicle.
2.2.Disengage the clips at locations by grasping the edges of the upper trim panel and lifting up.
2.3.Disengage the hook-and-loop fastener attachments at the rear of the upper trim panel by reaching under the panel and lifting straight up.
2.4.Raise the upper trim panel enough to clear the VINplate.
2000-2002 Saturn SL SW SC Series BCM Location 2
2000-2002 Saturn SL SW SC Series BCM

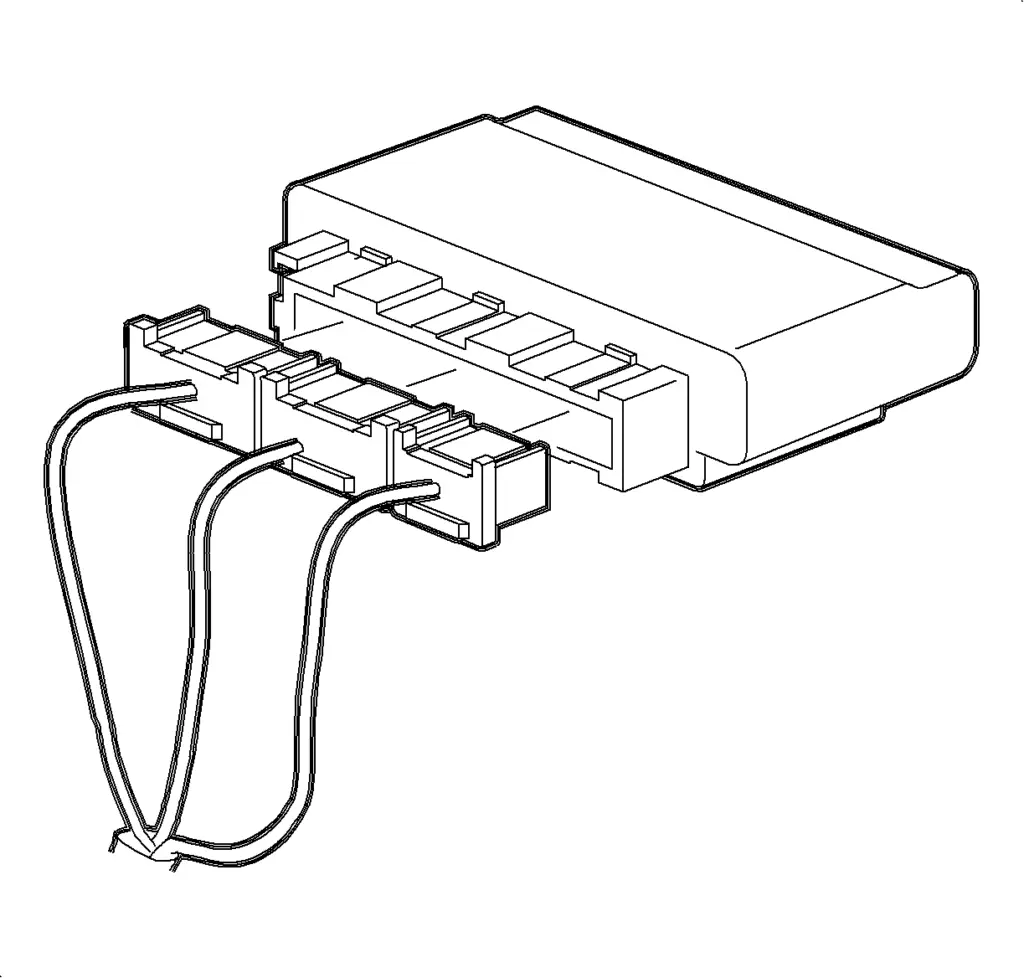
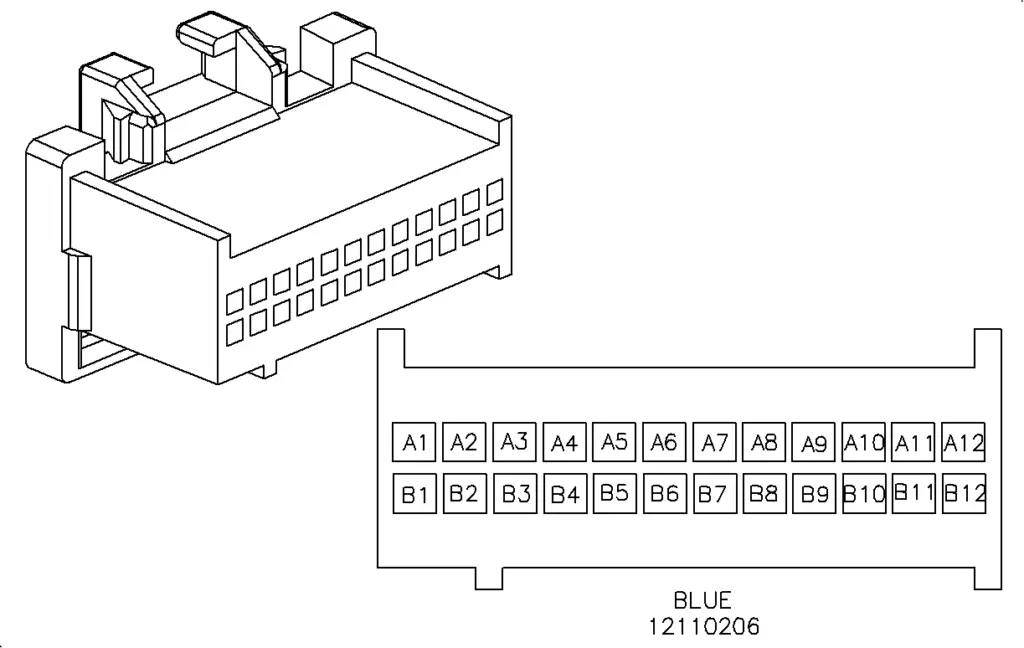
There are 3 electrical connectors on the BCM. We will need only J2 and J3.

Body Control Module Connector J2 Blue

2000-2002 Saturn SL SW SC Series BCM Connector J2 Blue

Body Control Module Connector J3 Brown  image is for pin reference connector is brown    

2000-2002 Saturn SL SW SC Series BCM Connector J3 Brown

If the enclosure of your NEWROCKIES PRO Module is green and blue, please setup the switches as following (if enclosure is black, please submit a request to our support team for correct switch configurations):

Open the NEWROCKIES PRO Module’s cover (this will NOT void the warranty) by removing the 2 screws on the bottom. Inside there are 2 sets of switches.

Set the switches as in the photo here below:

Passlock

Connect as following:

PRO Module
CAR Wires
RED
Splice together with WHT of the PRO Module into the BCM connector J3, Pin A12, Pink.
WHT
Splice together with RED of the PRO Module into the BCM connector J3, Pin A12, Pink.
BLK
Splice into the BCM connector J3, Pin B02 Black
PPL
Not Used
GRN
Not Used
YEL
Cut the Yellow wire in BCM connector J2, Pin A7 and attach to the BCM connector J2, Pin A7 Yellow, toward the BCM. Tape the other side.
BRN
Splice into the BCM connector J3, Pin B3 Black

Relearn Procedure

1. Turn ON the ignition, with the engine OFF.
2. Attempt to start the engine, then release the key to ON (vehicle will not start).
3. Observe the SECURITY light, after approximately 11 minutes the light will turn OFF.
4. Turn OFF the ignition, and wait 30 seconds.
Repeat steps 1-4 twice more for a total of three times. Then on the third time, leave the key off for 30 seconds.

the vehicle is now ready to relearn the Sensor Data Code and/or passwords on the next ignition switch transition from OFF to CRANK).

Important: The vehicle relearns Sensor Data Code and/or password on the next ignition switch transition from OFF to CRANK. You must turn the ignition OFF before attempting to start the vehicle.

Start the engine (the vehicle has now learned the Sensor Data Code and/or password).

Troubleshooting

  1. Make sure connector’s pinout and wiring colors of your car are both matching exactly those of our instructions. If not, please Submit a Request to our support team with details of the pinout and wiring colors in your car.
  2. Is the light on the side of the PRO module turning on? If not check power between RED and BLK wires of the PRO module installed and with the key in the ON position (you can use a power-meter or a light) and Submit a Request to our support team with results of the measurement.​
  3. If (1) and (2) are correct, is your vehicle cranking at all? Some systems are disabled due to the nature of the Passlock system and the specifics of the year. If your vehicle is not cranking, see if the starter relay (often in the under hood fuse block) clicks with the key turned to crank. You will need a second person to turn the key to crank while holding your finger on the starter relay.
  4. After you perform this test, or if you need our help to find the starter relay in your car, please Submit a Request to our technical support team detailing the tests you have done and the results.
  5. If the car is cranking, but engine doesn’t start or sometimes starts but immediately dies then do the following:
    1. Make sure the YELLOW wire of the PRO bypass is correctly connected and the connection is tight, and that you cut only the wire or wires indicated in the instructions, and on the proper side of the splice.
    2. Open the cover of the PRO Module and make sure the switches SW1 and SW2 are set exactly as indicated in the instructions for your car model/year, otherwise change them accordingly. Try starting the car.
  6. If during the relearn the battery went dead, or you turned the key off too soon, do the following.
    1. Take the battery cables off the battery, hold the ends together for 10 seconds then attach them to the battery.
    2. Try the relearn again with a charger or booster attached so the battery doesn’t run down. Be sure to cycle the key fully to start each time, then only release it to run and wait the time indicated.
    3. Also be sure the key was turned off for more than 30 seconds afterwards.

If car is still not starting or if you have any questions or concerns please Submit a Request to our technical support team detailing the tests you have done and the results.


NOTE: when contacting our support team, please always indicate your car’s make, model and year.

Is the GM Security System (VATS, Passkey or Passlock) giving you problems?

Would you like to solve the problem permanently...

You are in the right place!

NEWROCKIES is #1 in the world. It was born to solve GM VATS System problems once and for all and it’s the only thing we do. Our PRO Module is a FULL VATS Bypass that gets rid of the system entirely, the Key part, the Lock part and the TDM (which is the brain of the system).