
TDM location and how to install the NEWROCKIES VATS Full Bypass
The TDM is a function of the CCM module that is located under the rear shelf in the trunk.
The CCM has 2 connectors: C1 and C2
SHIPS FROM OUR *USA* WAREHOUSE – no extra duties or import fees for US customers
1993-1994 Cadillac Fleetwood
IMPORTANT PLEASE READ CAREFULLY: – RISK OF AIR BAG DEPLOYMENT –
The installation of the PRO Module NEVER requires to work on AIR-BAG wires, but it might require to work close to them.
Before proceeding with these installation instructions, unplug the battery of your car and wait 20 minutes, with the battery unplugged, for any stored energy to be discharged.
Leave the battery disconnected during the entire installation until it’s all installed, ready to be tested. Even with the battery disconnected, always make sure the wires you are working on are the correct ones. Never work on AIR-BAG wires with a tester, voltmeter or light or any other instrument that has a battery.
The TDM is a function of the CCM module that is located under the rear shelf in the trunk.
The CCM has 2 connectors: C1 and C2
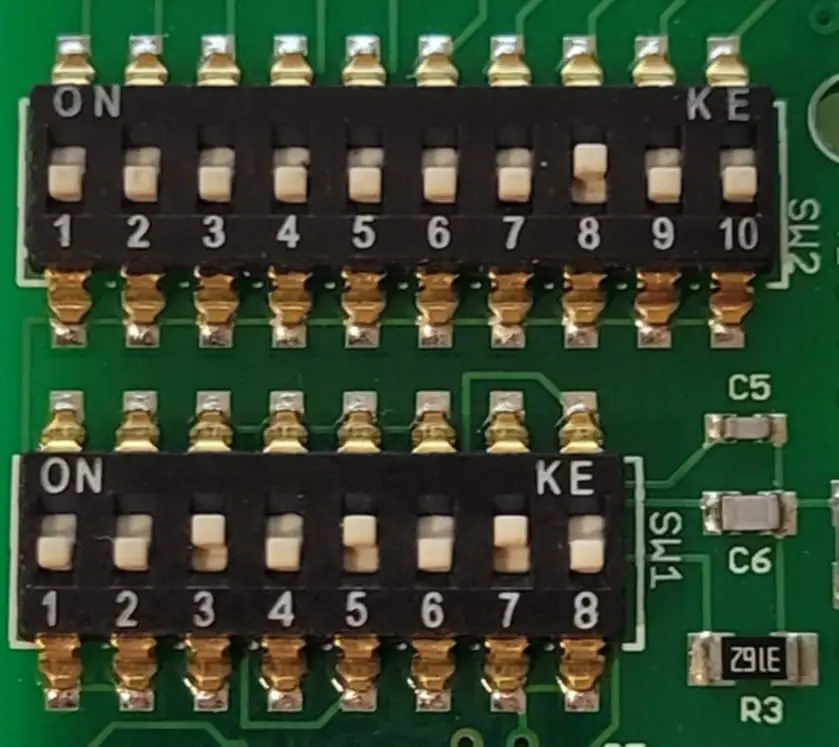
If the enclosure of your NEWROCKIES PRO Module is green and blue, please setup the switches as following (if enclosure is black, please submit a request to our support team for correct switch configurations):
Open the NEWROCKIES PRO Module’s cover (this will NOT void the warranty) by removing the 2 screws on the bottom. Inside there are 2 sets of switches.
Set the switches as in the photo here below:
If car is still not starting or if you have any questions or concerns please Submit a Request to our technical support team detailing the tests you have done and the results.
NOTE: when contacting our support team, please always indicate your car’s make, model and year.
You are in the right place!
NEWROCKIES is #1 in the world. It was born to solve GM VATS System problems once and for all and it’s the only thing we do. Our PRO Module is a FULL VATS Bypass that gets rid of the system entirely, the Key part, the Lock part and the TDM (which is the brain of the system).